Award-winning custom 3D printing in Ireland and Europe. See the details
How to Design 3D Models for 3D Printing: Your Comprehensive Guide
Introduction: Turning Your Ideas into Tangible 3D Prints
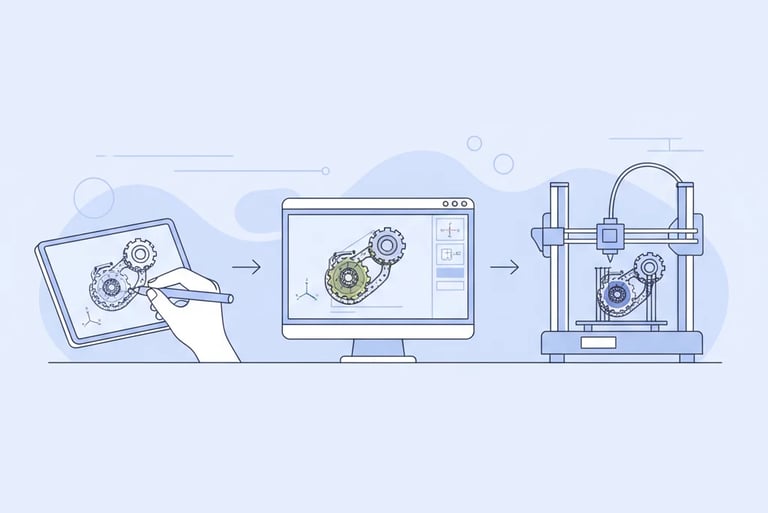
In the exciting world of 3D printing, the journey from an idea to a physical object begins long before the printer even starts to hum. It starts with a well-designed 3D model. Whether you’re an aspiring inventor, a passionate hobbyist, or a business looking for rapid prototyping, understanding how to design 3D models for 3D printing is absolutely essential. A perfectly designed model not only ensures a successful print but also guarantees the best possible quality, functionality, and aesthetic appeal of your final product.
This comprehensive guide will walk you through the fundamental principles and practical steps required to create designs that are truly 3D printer-friendly. We'll cover everything from choosing the right software and mastering crucial geometric rules to optimising your model for structural integrity and a flawless finish. By the end of this tutorial, you’ll be equipped with the knowledge to avoid common pitfalls, streamline your design process, and produce models that translate beautifully into physical objects. And when you're ready to bring your creations to life, remember that PrintIn3D, your award-winning affordable 3D printing service across Ireland, is here to turn your digital designs into stunning realities, offering expert advice and fast turnaround times for all your custom 3D printing needs.
Who This Is For
Aspiring 3D Designers & Engineers: Individuals looking to bridge the gap between their digital creations and physical prototypes.
Hobbyists & Makers: Those who want to create their own unique items, from custom figurines to functional office supplies, and understand print limitations.
Product Developers & Startups: Businesses needing to design and iterate prototypes quickly and efficiently.
Anyone Using a Personalized 3D Printing Service: If you plan to upload your designs for a 3D print on demand Ireland service, this guide is for you.
Step 1: Understand the Basics of 3D Printing Technology
Before you even begin designing, it’s crucial to have a foundational understanding of how 3D printers work and, specifically, the technology your prints will likely be produced on. The most common technology for custom 3D printing services catering to a broad audience, including PrintIn3D, is Fused Deposition Modelling (FDM). FDM printers build objects layer by layer, melting plastic filament and extruding it through a nozzle onto a build plate.
Understanding FDM helps you anticipate how your design will be constructed. For instance, gravity plays a significant role; molten plastic needs something beneath it to solidify upon. This leads to considerations like overhangs and support structures. Different materials, such as PLA, PETG, or TPU, also have unique properties that affect design choices – some are rigid, others flexible, and their shrinkage or adhesion characteristics can vary. Knowing these fundamentals is the first step towards creating truly printable designs, ensuring that what you design digitally can be successfully printed in the real world.
Research FDM: Familiarise yourself with how FDM printers extrude material, build layers, and the impact of layer height on print quality and strength.
Learn About Support Structures: Understand why supports are necessary for certain geometries and how they can affect surface finish.
Explore Material Properties: Investigate common 3D printing materials like PLA, PETG, ABS, and TPU. Each has distinct characteristics (strength, flexibility, temperature resistance) that will influence your design decisions. For example, if you're designing home decor, PLA is often suitable, but for durable tech accessories or custom parts, PETG or even TPU might be better.
Tip: Always consider the end-use of your part. Does it need to be rigid, flexible, heat-resistant, or finely detailed? Your material choice (and thus your design approach) should align with these requirements. For a deeper dive, check out our 3D printing materials guide.
Step 2: Choose and Master Your 3D Design Software
The right tool for the job makes all the difference. When it comes to 3D design software, there's a vast landscape of options, ranging from beginner-friendly web-based tools to professional-grade CAD packages. Your choice will largely depend on your experience level, the complexity of the models you intend to create, and your budget. For beginners, software like Tinkercad offers an intuitive drag-and-drop interface, perfect for learning basic solid modelling principles. As you advance, tools like Fusion 360 (free for hobbyists and startups), Blender (open-source, great for organic shapes and artistic models), or SolidWorks (industry-standard for engineering) provide more powerful features for precise modelling, assembly design, and complex surfacing.
Regardless of the software you choose, the key is to invest time in learning its functionalities. Most software packages share common principles, such as creating sketches, extruding, revolving, and using boolean operations. Proficiency in your chosen software will allow you to translate your ideas accurately into a digital format, ensuring your designs are robust and ready for a custom 3D parts printing online service. PrintIn3D also offers 3D design services if you need help turning a concept into a print-ready file.
Select Software Based on Needs:
Beginner-Friendly: Tinkercad, SketchUp Free
Intermediate/Hobbyist: Fusion 360, FreeCAD, Onshape
Advanced/Professional: SolidWorks, Inventor, Blender (for organic/artistic models)
Learn Core Features: Focus on solid modelling techniques: sketching, extrusion, sweeps, lofts, boolean operations (union, subtract, intersect), filleting, and chamfering.
Practice Regularly: Start with simple objects and gradually increase complexity. The more you practice, the more intuitive the design process becomes.
Tip: Many software companies offer free trials, educational licenses, or robust community tutorials. Leverage these resources to get comfortable before committing to a paid solution.
Step 3: Master Model Dimensions and Scale
One of the most critical aspects of designing for 3D printing is ensuring your model's dimensions and scale are accurate. Unlike purely digital creations, 3D printed objects exist in the real world and must fit their intended purpose. If you're designing a replacement part, it needs to match the original's measurements precisely. If you're creating a custom figurine, you need to decide on its final height and ensure all features scale correctly. Most 3D design software operates in specific units (millimetres are standard for 3D printing), and it's vital that your design matches these units consistently.
Careful measurement and attention to detail during this stage can save you considerable time and material by avoiding misprints. While professional services like PrintIn3D can often catch scale issues during their pre-print checks, designing with accuracy from the start empowers you and ensures your vision is realised exactly as intended. When uploading your design for online custom 3d printing quotes, precise dimensions are key to getting accurate pricing and print estimates.
Set Your Units: Always ensure your design software is set to the correct units (preferably millimetres, as it's the most common for 3D printing and precise engineering).
Measure Accurately: If designing a part to fit another object, use callipers or a ruler to get precise measurements. Don't eyeball it!
Design to Scale: Create your model at its actual intended size. Avoid designing a small object and then scaling it up drastically later, as this can exaggerate any mesh imperfections.
Consider Shrinkage: While advanced printers and materials minimise this, some materials can shrink slightly during cooling. Professional services account for this, but it's good to be aware.
Warning: Designing without proper unit setup or neglecting real-world measurements is a common cause of failed prints or ill-fitting parts. Always double-check your dimensions before exporting!
Step 4: Ensure Watertight Meshes and Manifold Geometry
This is arguably the most fundamental rule for successful 3D printing. A "watertight" or "manifold" mesh means your 3D model forms a completely enclosed volume without any holes, gaps, intersecting faces, or internal geometry that doesn't belong. Imagine trying to fill your digital model with water; if it leaks, it's not watertight. From a 3D printer's perspective, a non-watertight model is ambiguous – it doesn't know what's "inside" and what's "outside" the object, leading to errors, missing layers, or incomplete prints.
Common issues include disconnected vertices, open edges, flipped normals (where a face points inward instead of outward), or self-intersecting geometry. Most 3D design software has tools to check and repair these issues, often under names like "mesh analysis," "solid inspector," or "repair utility." Learning to identify and fix these problems is crucial for any aspiring 3D designer, as it directly impacts the printability of your model and the quality of your 3d print on demand Ireland experience.
Understand Non-Manifold Geometry: Learn to recognise common issues like open edges, holes, overlapping faces, and internal intersections.
Use Mesh Analysis Tools: Most CAD and 3D modelling software (e.g., Fusion 360, Blender's 3D Print Toolbox addon) have built-in tools to detect and highlight non-manifold errors.
Employ Repair Functions: After identifying issues, use repair functions within your software or dedicated mesh repair tools (like Netfabb Basic or MeshMixer) to automatically or manually fix them.
Avoid Self-Intersections: Be careful when combining objects or performing boolean operations; these are common culprits for creating self-intersecting geometry.
Tip: Think of your model as a physical object made from clay. If you could sculpt it in clay, it would have a defined inside and outside. Your digital model needs to mimic this solid-body characteristic.
Step 5: Design for Structural Integrity and Strength
A beautiful design is only useful if it holds together. When designing custom 3D parts printing online or custom toys, considering structural integrity is paramount. 3D printed objects, particularly those made with FDM, can have anisotropic properties, meaning their strength varies depending on the printing direction. Layers are strongest along the X and Y axes (across the print bed) and weakest along the Z-axis (between layers).
To enhance strength, incorporate features like fillets and chamfers at sharp corners, which distribute stress more evenly. Avoid creating thin, unsupported columns or cantilevers that are prone to snapping. If your object needs to withstand specific loads, think about its intended orientation during printing and reinforce critical areas. While PrintIn3D uses advanced printers like the Bambu Lab X1C for high-quality, durable prints, thoughtful design on your end can significantly improve the final product's resilience and longevity.
Add Fillets and Chamfers: Rounding sharp internal and external corners with fillets or chamfers helps distribute stress, making parts more durable and less prone to cracking.
Reinforce Stress Points: Identify areas that will experience high stress or frequent impact and design them with thicker walls or internal reinforcing ribs.
Consider Wall Orientation: Think about how the layers will be oriented relative to the forces your part will endure. Design features to align with the strongest printing axis where possible.
Avoid Thin, Tall Structures: These are inherently weak. Either thicken them, add supporting gussets, or redesign to be more robust.
Warning: Overlooking structural considerations can lead to parts that break easily under normal use, wasting both time and material.
Step 6: Mind Your Wall Thickness and Detail Resolution
One of the most frequent issues encountered in 3D printing design is insufficient wall thickness. If a wall is too thin, it won't be strong enough to print correctly, or it might be too fragile to survive handling. Similarly, tiny details might simply be too small for the printer's nozzle to reproduce accurately, resulting in blobs, missing features, or a lack of crispness in the final printed object.
As a general rule for FDM printing, a minimum wall thickness of 1.0mm to 2.0mm is recommended, though this can vary depending on the material and the specific printer. For fine details, consider the nozzle size of the printer (typically 0.4mm for standard FDM). Any feature smaller than this may not be captured. When designing personalized 3d printing service items or intricate custom figurines, pay close attention to these limits to ensure your details shine through.
Maintain Minimum Wall Thickness: Aim for at least 1.0mm for non-load-bearing walls and 1.5mm-2.0mm for structural elements. Always check the specific recommendations for your chosen material if known.
Check Detail Size: Ensure small features like embossed text, engraved lines, or intricate patterns are large enough to be resolved by a typical 0.4mm nozzle. A good rule of thumb is to make raised features at least 0.8mm wide and deep, and engraved features at least 0.5mm wide and 0.5mm deep.
Avoid Extreme Angles: Very shallow angles on top surfaces can sometimes lead to poor layer adhesion or rough finishes.
Warning: Walls thinner than the printer's nozzle diameter simply cannot be printed, resulting in gaps or incomplete features. Always test print small, critical features if you are unsure.
Step 7: Optimize for Overhangs and Bridging
Gravity is an inescapable force in 3D printing. When an FDM printer lays down a new layer of plastic, it needs something beneath it to adhere to. An "overhang" occurs when a part of your model extends outward without direct support from the layer below. A "bridge" is a horizontal span connecting two raised points without support beneath. While printers can handle some degree of overhangs and bridges, exceeding certain angles or lengths will lead to sagging, spaghetti-like failures, or a poor surface finish on the underside of your print.
Designers can mitigate these issues by incorporating self-supporting angles (typically anything less than 45-60 degrees from the vertical needs no support) or by breaking down complex geometries into smaller, interlocking parts that can be printed separately and assembled. When creating your 3D design models, proactively thinking about how they will be printed can drastically reduce the need for extensive support structures, which save print time and improve surface quality.
Design with Self-Supporting Angles: Aim for angles greater than 45 degrees from the horizontal where possible. This allows each new layer to be printed mostly on top of the previous one.
Minimise Bridging: Keep horizontal spans between two points as short as possible. Modern printers can bridge a few centimetres without issues, but longer spans will sag.
Incorporate Fillets for Gradual Overhangs: Instead of sharp 90-degree overhangs, use fillets to create smoother transitions, making them easier to print without supports.
Split Complex Models: If a model has unavoidable large overhangs or intricate internal features, consider splitting it into multiple parts that can be printed individually and then assembled.
Tip: If you use a slicing software to preview your model (even if you're not printing it yourself), it will highlight areas that require support structures. This can be a great way to identify and redesign problematic sections.
Step 8: Plan for Assembly and Multi-Part Prints
Sometimes, a single-piece print isn't feasible or desirable due to complexity, size, or functionality. For larger objects, intricate mechanisms, or designs with moving parts, breaking your model into multiple components for separate printing and subsequent assembly is often the best approach. This strategy allows you to optimise the print orientation for each part, minimise support material, and achieve higher detail and better surface finish where it matters most. It's especially useful for custom 3D parts printing online or 3D printing for custom toys Ireland that might have articulated joints.
When designing interlocking parts, tolerances are key. 3D printers have a certain level of precision, and molten plastic doesn't always go exactly where you want it. Therefore, you need to design clearances – small gaps – between mating surfaces to ensure parts fit together without excessive force or post-processing. A common starting point for FDM is a clearance of 0.2mm to 0.5mm, depending on the printer's accuracy and the desired fit (e.g., tight press-fit vs. loose sliding fit).
Design Clearances: For parts that need to fit together (e.g., pegs into holes, interlocking sections), design a small gap (e.g., 0.2mm to 0.5mm) between mating surfaces to account for material expansion, printer tolerances, and slight inaccuracies.
Incorporate Fastening Features: Think about how parts will be joined – using screws, snap-fits, glue, or dowels. Design appropriate holes, recesses, or interlocking mechanisms.
Optimise Print Orientation for Each Part: By printing parts individually, you can choose the best orientation for each component to maximise strength, minimise supports, and improve surface quality.
Test Fit Small Sections: If your assembly is complex, consider printing small test pieces of the mating surfaces first to verify your tolerances before printing the entire design.
Tip: When designing snap-fit connectors, consider the material's flexibility. TPU, for instance, offers excellent flexibility for durable snap-fits, whereas rigid PLA might require more careful design to avoid breakage.
Step 9: Prepare Your Model for Export (STL, OBJ, 3MF)
Once your 3D model is perfectly designed, the next crucial step is to export it into a file format that 3D printers and slicing software can understand. The most common and widely accepted format for 3D printing is STL (STereoLithography). This format represents your 3D model as a series of interconnected triangles that approximate its surface geometry. Other popular formats include OBJ and, increasingly, 3MF, which can store more information like colour, materials, and internal structures.
When exporting, you'll often have options for resolution or facet density. It's important to choose a resolution that accurately represents your design without making the file unnecessarily large. Too low a resolution will make your smooth curves appear faceted, while too high a resolution can create massive file sizes that are difficult to process and offer no real benefit in print quality. Always ensure your chosen units (e.g., millimetres) are correctly transferred during export, especially when preparing your file for online custom 3d printing quotes.
Export as STL (or OBJ/3MF): Most 3D design software has a "Save As" or "Export" option for STL. Prioritise STL for broad compatibility, but consider 3MF if you need to convey more complex data (like multi-material assignments).
Check Export Resolution: Choose a "fine" or "high" resolution setting to ensure smooth surfaces and accurate representation of your details. Avoid "coarse" settings which will result in a blocky, faceted model. Conversely, "very fine" or "custom" settings with extremely small deviation values can lead to excessively large files without noticeable print quality improvement.
Verify Units: Confirm that your export preserves the correct units (e.g., millimetres). Many services will assume units based on common practice, but explicit confirmation is always best.
Combine Parts (if applicable): If your design consists of multiple separate bodies that are intended to be a single printed object, ensure they are combined or merged into one solid object before export.
Warning: Exporting with too low a resolution can make your smooth surfaces appear "blocky" or faceted, degrading the quality of your final print. Always review the exported mesh if possible before sending it off.
Step 10: Perform a Final Pre-Print Check with a Slicer or Online Tool
Even after meticulously designing and exporting your model, a final verification step is invaluable. Slicing software (like PrusaSlicer, Cura, or Bambu Studio) is typically used by 3D printer operators to convert your 3D model into printer-specific instructions (G-code). However, you can use these tools to perform a critical pre-print check yourself, even if you’re using a 3D printing near me Dublin service like PrintIn3D to handle the actual printing. Loading your STL into a slicer allows you to visualise how the printer will interpret your design, highlighting potential issues that might have been missed in the design phase.
You can see where support structures will be generated, identify overly thin walls, check for non-manifold errors, and even get an estimate of print time and material usage. Many online custom 3d printing quotes platforms also have built-in viewers that perform similar analyses, providing immediate feedback on printability. This step acts as a final safeguard, giving you confidence that your design is truly ready for production.
Download a Free Slicer: Popular options include PrusaSlicer, Ultimaker Cura, or Bambu Studio. These are free and provide excellent visualisations.
Load Your STL: Open your exported STL file in the slicer software.
Perform Visual Inspection:
Check for red/highlighted areas indicating errors (non-manifold geometry).
Observe areas where supports are generated – does this match your expectations? Can you redesign to minimise them?
Use the "layer view" or "preview" mode to scroll through each layer and identify any missing sections, gaps, or extremely thin walls.
Verify overall model size and orientation.
Utilise Online Analysis Tools: Many online custom 3d printing quotes platforms offer automated analysis of your uploaded file, providing immediate feedback on printability and cost.
Tip: Don't just rely on the default settings in a slicer. Experiment with different orientations of your model on the build plate to see how it affects support requirements and part strength. For a more detailed guide, see our 3D printing checklist.
Step 11: Leverage Professional 3D Printing Services for Production
Once you’ve meticulously designed and checked your 3D model for printability, the final step is to bring it to life. While owning your own 3D printer is an option, professional 3D printing services like PrintIn3D offer unparalleled advantages, especially for complex designs, specific material requirements, or when you need reliable, high-quality results without the hassle of managing a printer yourself. We handle the intricacies of slicing, machine calibration, material selection, and post-processing, ensuring your vision is realised with award-winning precision.
PrintIn3D provides a seamless experience for 3D print on demand Ireland, offering everything from custom toys to best 3d printing for custom parts. Whether you’re based in Dublin and looking for a 3d print service Dublin, or anywhere else in Ireland, we provide personalized 3d printing service with fast turnaround and dedicated support. Our expertise, combined with our 'Silver Rising Star' award, guarantees that your carefully crafted designs will be transformed into high-quality physical objects, allowing you to focus on innovation while we handle the production.
Submit Your Design: Upload your print-ready STL (or other supported format) to PrintIn3D's online custom 3d printing quotes platform.
Review Service Feedback: Professional services often perform a final check and may offer advice or identify minor issues you might have missed.
Choose Your Material: Select the material that best suits your design's functional and aesthetic requirements. PrintIn3D offers a range of high-quality filaments.
Confirm Order & Production: Once your order is confirmed, PrintIn3D will handle the printing, quality control, and shipping of your custom 3D printed objects directly to you.
Tip: Don't hesitate to contact PrintIn3D's friendly WhatsApp support if you have any questions about your design's printability or need guidance on material selection. We're here to make your experience hassle-free and ensure you get the best 3d printing for custom parts.
Common Mistakes to Avoid
Even with the best intentions, designers new to 3D printing can sometimes stumble. Avoiding these common pitfalls will save you time, material, and frustration, ensuring your designs transition smoothly from digital concept to physical reality.
Non-Manifold Geometry: This is the cardinal sin of 3D printing. Holes, flipped normals, or intersecting faces mean the printer doesn't know what to print. Always ensure your model is a single, watertight volume.
Insufficient Wall Thickness: Walls that are too thin (e.g., less than 1.0mm) will often break during printing, handling, or simply not appear in the final print. Reinforce thin features.
Excessive Overhangs Without Support: Large sections of your model hanging in mid-air (especially at shallow angles) will sag and fail without proper support structures, leading to messy prints. Design with self-supporting angles or plan for supports.
Ignoring Material Properties: Designing a flexible part with rigid PLA or expecting a strong structural component from a brittle material will lead to disappointment. Match your design to the appropriate filament properties. Our materials guide can help.
Incorrect Scale or Units: Designing in inches when the printer expects millimetres, or vice versa, leads to dramatically oversized or undersized prints. Always confirm your units.
Not Designing for Tolerances: For multi-part assemblies, failing to add small clearances between mating surfaces will result in parts that don't fit together, requiring sanding or reprinting.
Ignoring Print Orientation: The way a part is oriented on the print bed affects its strength, surface quality, and support requirements. Don't just leave it to default; consider the best orientation.
Too Many Fine Details: While 3D printers can be precise, features smaller than the nozzle diameter (typically 0.4mm for FDM) or extremely thin embossed/engraved elements will be lost or poorly reproduced.
Frequently Asked Questions (FAQ)
What file format is best for 3D printing?
The most widely accepted and recommended file format for 3D printing is STL (.stl). It's a universal standard that describes the surface geometry of your 3D model using a mesh of interconnected triangles. Most 3D design software can export to STL. OBJ (.obj) is another common format, and 3MF (.3mf) is gaining popularity for its ability to store more complex information like colours and textures, but STL remains the most compatible for professional 3d print on demand Ireland services like PrintIn3D.
How do I know if my 3D model is printable?
The best way to check for printability is to ensure your model has a "watertight" or "manifold" mesh (no holes or internal intersections). You should also check for sufficient wall thickness (typically 1-2mm minimum for FDM), minimal unsupported overhangs, and appropriate detail resolution. Using a free slicing software (like Cura or PrusaSlicer) to preview your model can highlight potential issues and show where supports would be needed. PrintIn3D also performs a pre-print check on all uploaded files.
Can PrintIn3D help me if my design isn't ready?
Absolutely! If you have an idea or a design that isn't quite print-ready, PrintIn3D offers 3D design services to help you refine your model, create a completely new design from your concept, or make it compatible with 3D printing. Our team of experts can assist in transforming your vision into a perfect, printable 3D model, ensuring you get the best 3d printing for custom parts.
What materials can I design for when using a service like PrintIn3D?
PrintIn3D offers a variety of high-quality materials, primarily focusing on robust FDM filaments. Common options include PLA (great for general-purpose, decorative items), PETG (more durable, flexible, and heat-resistant than PLA), and TPU (highly flexible and impact-resistant). Each material has different properties, so consider the end-use of your part when designing. Our 3D printing materials guide provides more detailed information.
How much does custom 3D printing cost in Ireland?
The cost of custom 3D parts printing online depends on several factors: the size and complexity of your model, the material chosen, the amount of material required, and the desired print quality/speed. PrintIn3D provides instant online custom 3d printing quotes when you upload your 3D model, giving you a clear estimate upfront. We aim to offer affordable 3D printing services across Ireland without compromising on quality.
Next Steps: Bring Your Designs to Life with PrintIn3D
Now that you're armed with the knowledge to design impeccable 3D models, it's time to experience the joy of seeing your creations materialise. Upload your print-ready files to PrintIn3D today for instant online custom 3d printing quotes, and let Ireland's 'Silver Rising Star' award-winning service transform your ideas into reality. Visit our custom 3D printing service page to get started!
One stop shop for all things 3D
Upload your 3D files for hassle-free printing.
Irish Print Awards 2026 finalist (3 categories) — Custom 3D printing, 3D scanning and 3D design in Ireland and Europe with fast WhatsApp support.
Help and Support
Know about the latest offers
info@printin3d.ie
+353899605778
© 2026. All rights reserved.